PROFESSIONAL INSTALLATION IS RECOMMENDED.
![]()
DO NOT attempt to perform maintenance on this door unless:
- you have the proper tools and reasonable mechanical aptitude or experience; and
- you follow these instructions very carefully.
EZ-SET® TORSION SPRING(S): HOW TO REMOVE TENSION FROM SPRINGS TO REPLACE DOOR HARDWARE
These instructions apply only for the purpose of removing tension from residential EZ-SET® torsion spring configurations with standard radius (springs mounted to front header of garage). Please refer to the ‟B” diagrams on page 4 to confirm.
 Disconnect garage door opener. Refer to your door opener manual for instructions on how to disconnect. Lock door securely in down position using the door lock. If there is no door lock, to secure door in down position, apply C-clamp or locking pliers placed in track, directly above a roller.
![]() DOOR MUST BE LOCKED IN DOWN POSITION ACCORDING TO STEP 1 TO PREVENT DOOR FROM PREMATURELY OPENING WHICH COULD CAUSE INJURY.
DOOR MUST BE LOCKED IN DOWN POSITION ACCORDING TO STEP 1 TO PREVENT DOOR FROM PREMATURELY OPENING WHICH COULD CAUSE INJURY.
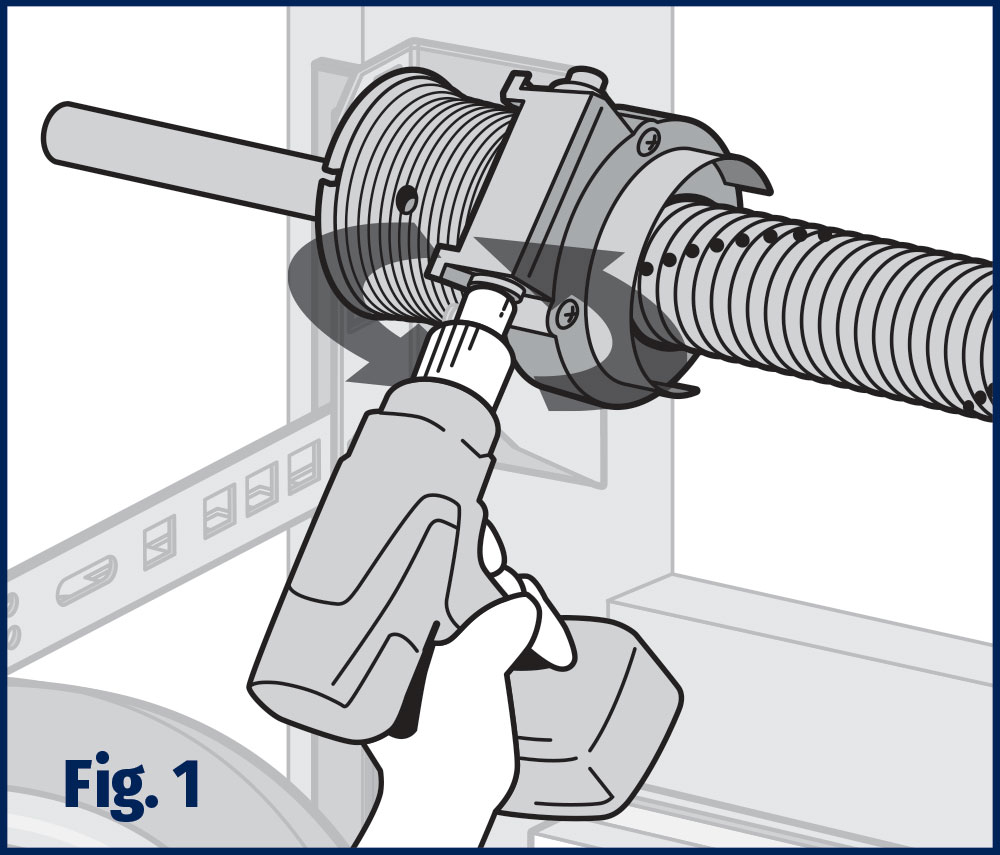
 Remove all tension COMPLETELY from torsion spring. DO NOT loosen any set screws on spring winding cones. Insert 1/4″ insert bit in drill and engage bit or 7/16″ socket wrench on drive shaft of winding unit and rotate drive shaft counterclockwise to remove tension from spring (Fig. 1).
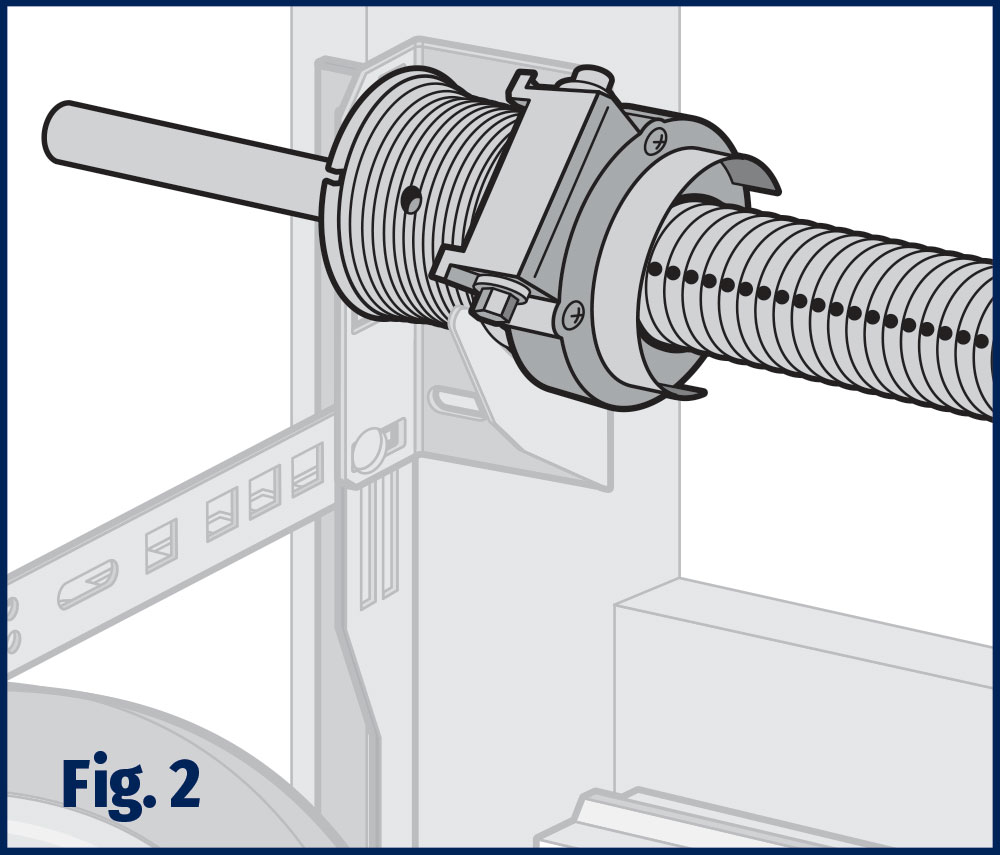
NOTE: Using drill on the high speed setting may cause lubricant to come out of winding unit. All tension in spring is removed when line (or description) on spring is in a straight line. There should be no tension on torsion cables and shaft should rotate freely (Fig. 2).