


BEFORE PROCEEDING WITH REPLACEMENT:
Please take a moment to review all IMPORTANT SAFETY INFORMATION.
BEFORE REPLACING HARDWARE COMPONENTS:
Follow the corresponding instructions relating to your specific spring type to REMOVE SPRING TENSION. View the 3 spring types below and use the figures to determine which spring type your garage door utilizes.

REMOVE SPRING TENSION:
Choose your spring type below and follow along with step-by-step instructions. Please review important safety warnings before removing spring tension.

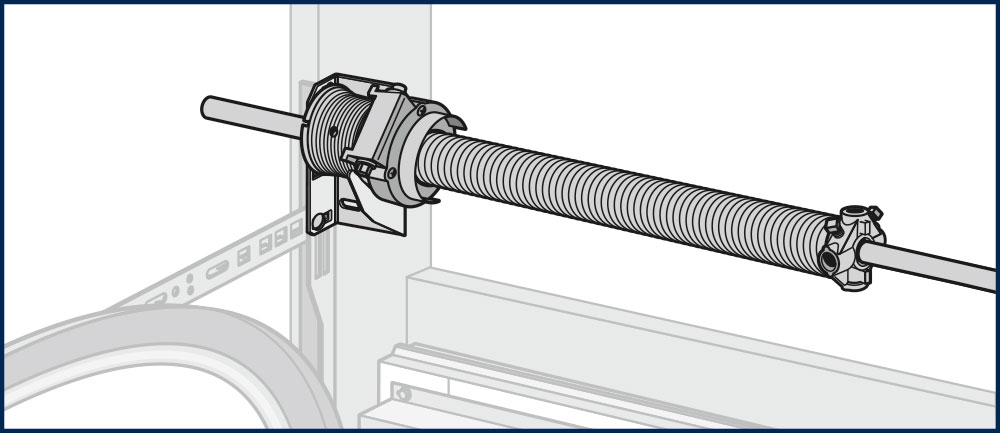
REMOVE STANDARD TORSION SPRING TENSION
View Tools Needed View Tools Needed ATTEMPTING TO ADJUST OR REMOVE A TORSION SPRING ASSEMBLY AND/OR ANY RED COLORED FASTENERS WITHOUT PROPER TRAINING OR TOOLS MAY [...]
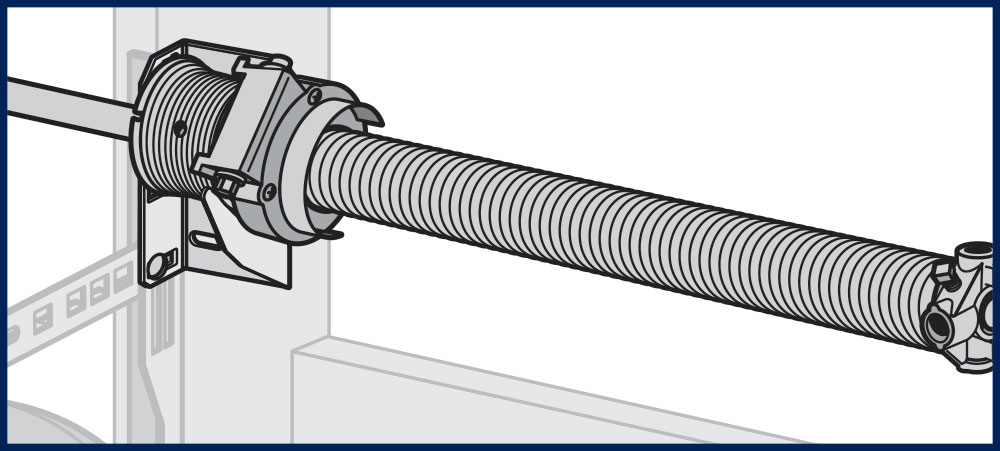
REMOVE EZ-SET® TORSION SPRING TENSION
View Tools Needed View Tools Needed ATTEMPTING TO ADJUST OR REMOVE AN EZ-SET® TORSION SPRING ASSEMBLY AND/OR ANY RED COLORED FASTENERS WITHOUT PROPER TRAINING OR TOOLS MAY [...]
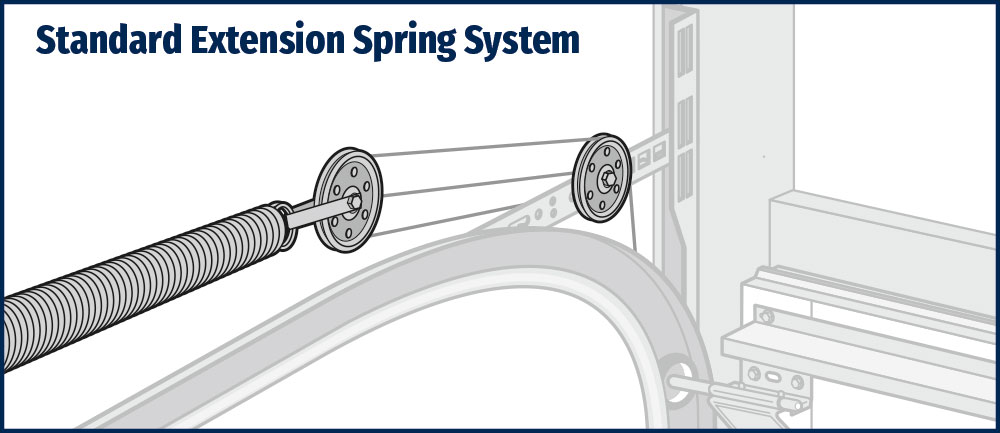
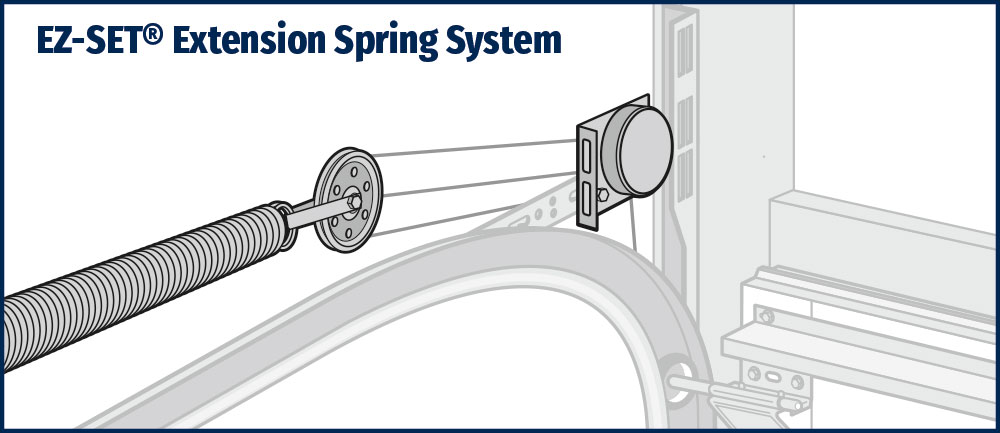
REMOVE EXTENSION SPRING TENSION (Standard or EZ-SET®)
View Tools Needed View Tools Needed ATTEMPTING TO ADJUST OR REMOVE AN EXTENSION SPRING ASSEMBLY AND/OR ANY RED COLORED FASTENERS WITHOUT PROPER TRAINING OR TOOLS MAY RESULT [...]
REPLACE HARDWARE COMPONENTS:
After spring tension has been removed, follow the below instructions to replace the noted hardware components. Please review all warnings carefully before proceeding.

![]() SERIOUS INJURY COULD RESULT IF SPRING TENSION HAS NOT BEEN RELEASED BEFORE OTHER WORK BEGINS. PLEASE REFER TO APPLICABLE SPRING TYPE PROCEDURE DEMONSTRATING REMOVAL OF SPRING TENSION.
SERIOUS INJURY COULD RESULT IF SPRING TENSION HAS NOT BEEN RELEASED BEFORE OTHER WORK BEGINS. PLEASE REFER TO APPLICABLE SPRING TYPE PROCEDURE DEMONSTRATING REMOVAL OF SPRING TENSION.
![]() IF DOOR IS CONNECTED TO AN AUTOMATIC OPENER, BE SURE TO DISENGAGE OPENER BEFORE BEGINNING WORK.
IF DOOR IS CONNECTED TO AN AUTOMATIC OPENER, BE SURE TO DISENGAGE OPENER BEFORE BEGINNING WORK.
NOTE: Opener should already be disengaged as required in Procedure 1.
![]() ONLY REPLACE TOP BRACKET WHEN DOOR IS IN DOWN AND IN LOCKED POSITION TO AVOID SERIOUS INJURY.
ONLY REPLACE TOP BRACKET WHEN DOOR IS IN DOWN AND IN LOCKED POSITION TO AVOID SERIOUS INJURY.
![]() NEVER REPLACE MORE THAN ONE TOP BRACKET AT A TIME TO AVOID DOOR SECTIONS FALLING AND POTENTIAL SERIOUS INJURY.
NEVER REPLACE MORE THAN ONE TOP BRACKET AT A TIME TO AVOID DOOR SECTIONS FALLING AND POTENTIAL SERIOUS INJURY.
 Using a wrench or socket driver, remove one of the old top brackets. For wood doors, use equivalent fasteners from what was removed.
 Remove roller from top bracket and track.
 Insert replacement roller into replacement top bracket and track before bolting replacement bracket to door. Using indicated fasteners, bolt replacement top bracket to door (Fig. 1).
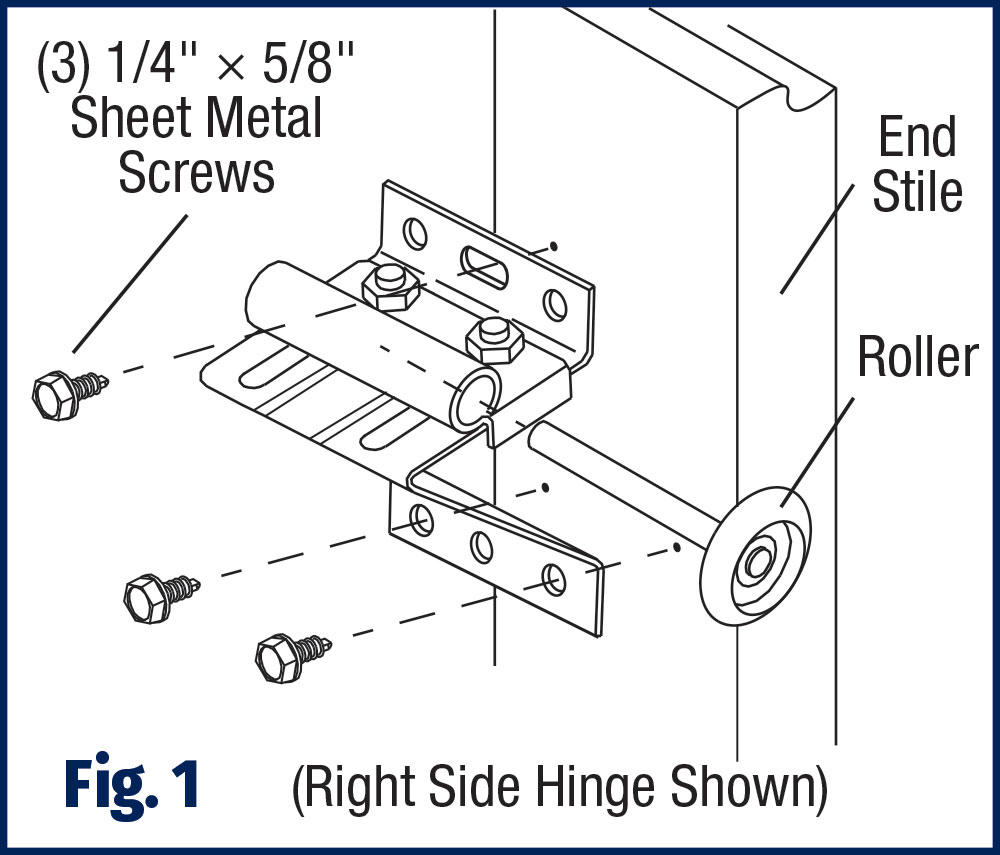
 With slide on replacement top bracket loose, push top of door against stop molding or door jamb. Pull replacement roller towards you so it is tight against the groove in the track and tighten slide bolts.
 Repeat on opposite side.
AFTER REPLACING HARDWARE COMPONENTS:
Follow the corresponding instructions relating to your specific spring type to REAPPLY SPRING TENSION.
REAPPLY SPRING TENSION:
Choose your spring type below and follow along with step-by-step instructions. Please review important safety warnings before reapplying spring tension.
REAPPLY TENSION STANDARD TORSION SPRINGS
View Tools Needed View Tools Needed NEVER ADJUST CENTER BEARING PLATE OR RED-HEADED FASTENERS AFTER SPRINGS ARE WOUND AS IT MAY RESULT IN AN UNCONTROLLED RELEASE OF [...]
REAPPLY TENSION EZ-SET® TORSION SPRINGS
View Tools Needed View Tools Needed FAILURE TO FOLLOW THE FOLLOWING INSTRUCTIONS MAY RESULT IN RAPID RELEASE OF SPRING ENERGY CAUSING DAMAGE TO THE UNIT OR SERIOUS [...]
REAPPLY TENSION EXTENSION SPRINGS (Standard or EZ-SET®)
View Tools Needed View Tools Needed FAILURE TO FOLLOW THE FOLLOWING INSTRUCTIONS MAY RESULT IN RAPID RELEASE OF SPRING ENERGY CAUSING DAMAGE TO THE UNIT OR SERIOUS [...]